Getting Started
This section describes how to get SolarNode running on a device. You will need to configure your device as a SolarNode and associate your SolarNode with SolarNetwork.
Tip
You might find it helpful to read through this entire guide before jumping in. There are screen shots and tips provided to help you along the way.
Get your device ready to use
SolarNode can run on a variety of devices. To get started using SolarNode, you must download the appropriate SolarNodeOS image for your device. SolarNodeOS is a complete operating system tailor made for SolarNode. Choose the SolarNodeOS image for the device you want to run SolarNode on and then copy that image to your device media (typically an SD card).
Choose your device
The Raspberry Pi is the best supported option for general SolarNode deployments. Models 3 or later, Compute Module 3 or later, and Zero 2 W or later are supported. Use a tool like Etcher or Raspberry Pi Imager to copy the image to an SD card (minimum size is 2 GB, 4 GB recommended).
Configure your network
SolarNode needs a network connection. If your device has an ethernet port, that is the most reliable way to get started: just plug in your ethernet cable and off you go!
If you want to use WiFi, or would like more detailed information about SolarNode's networking options, see the Networking sections.
Power it on
Insert your SD card (or other device media) into your device, and power it on. While it starts up, proceed with the next steps.
Associate your SolarNode with SolarNetwork
Every SolarNode must be associated (registered) with a SolarNetwork account. To associate a SolarNode, you must:
- Log into SolarNetwork
- Generate an invitation for a new SolarNode
- Accept the invitation on SolarNode
Log into SolarNetwork
If you do not already have a SolarNetwork account, register for one and then log in.
Generate a SolarNode invitation
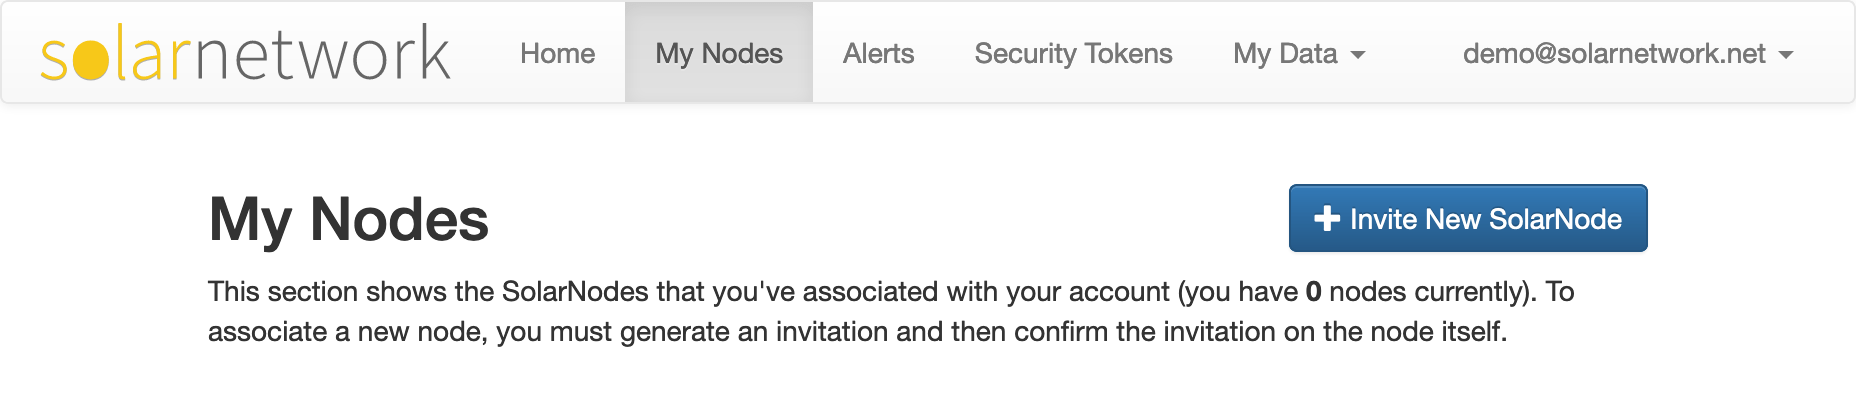
Click on the My Nodes link. You will see an Invite New SolarNode button, like this:
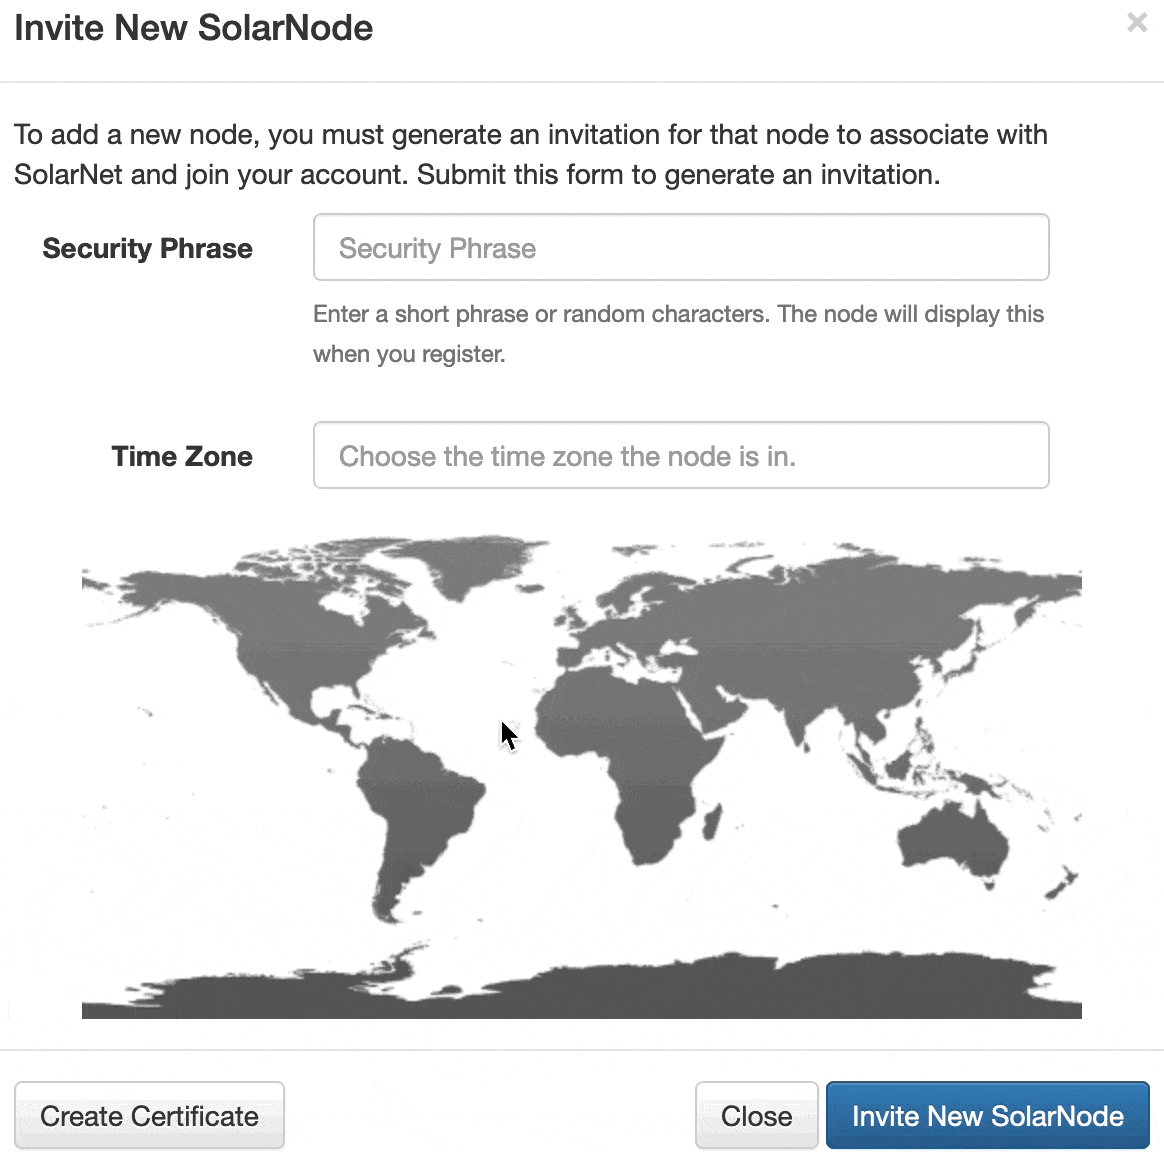
Click the Invite New SolarNode button, then fill in and submit the form that appears and select your time zone by clicking on the world map:
The generated SolarNode invitation will appear next.
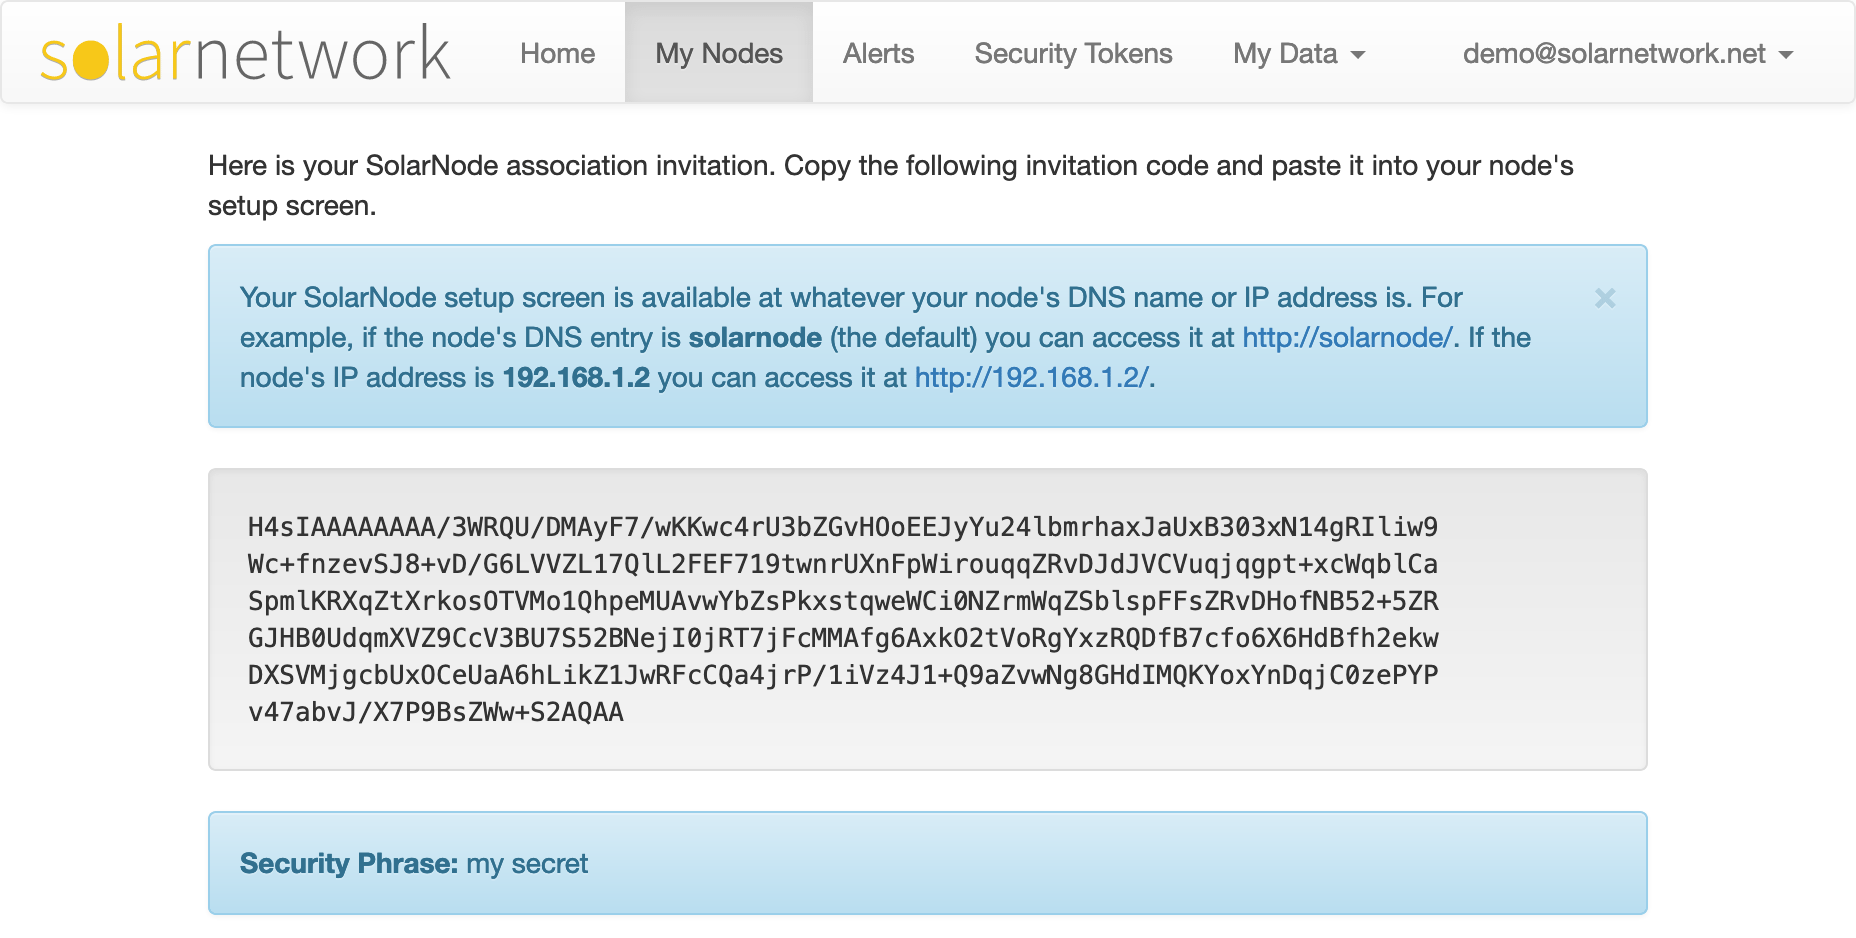
Select and copy the entire invitation. You will need to paste that into the SolarNode setup screen in the next section.
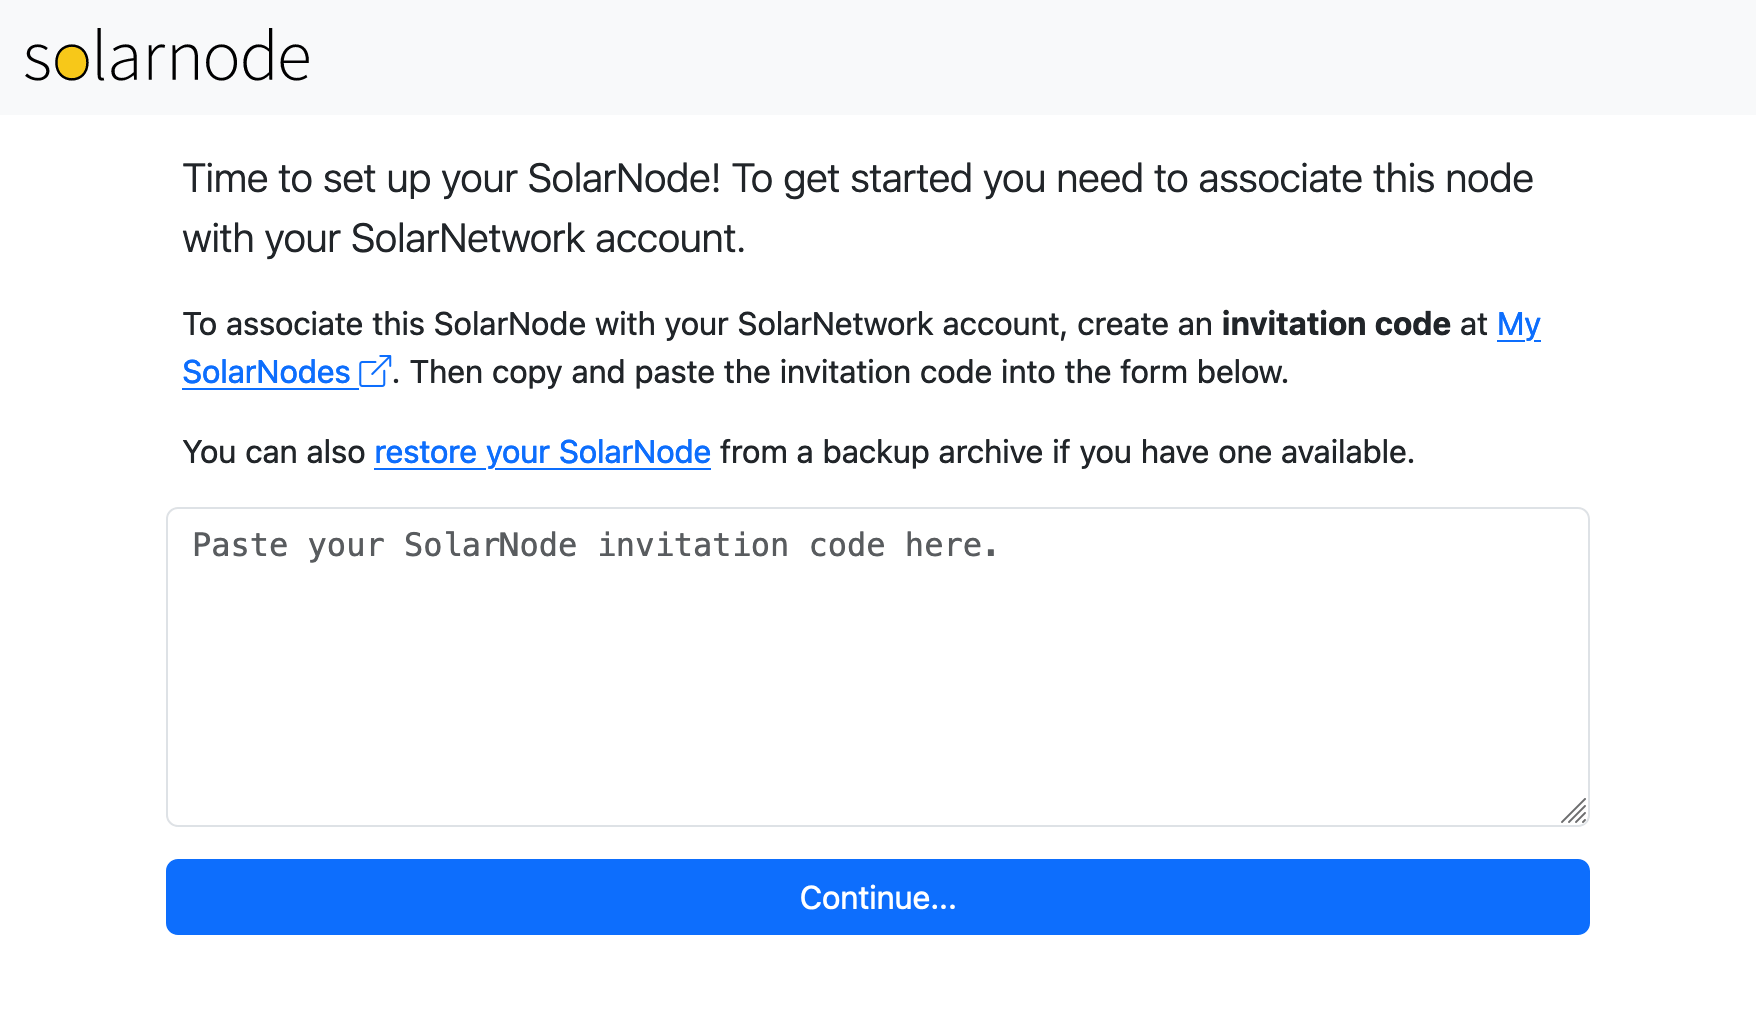
Accept the invitation on SolarNode
Open the SolarNode Setup app in your browser. The URL to use might be http://solarnode/ or it
might be an IP address like http://192.168.1.123. See the Networking section for
more information. You will be greeted with an invitation acceptance form into which you can paste
the invitation you generated in SolarNetwork. The acceptance process goes through the following steps:
- Submit the invitation in the acceptance form
- Preview the invitation details
- Confirm the invitation
First you submit the invitation in the acceptance form.
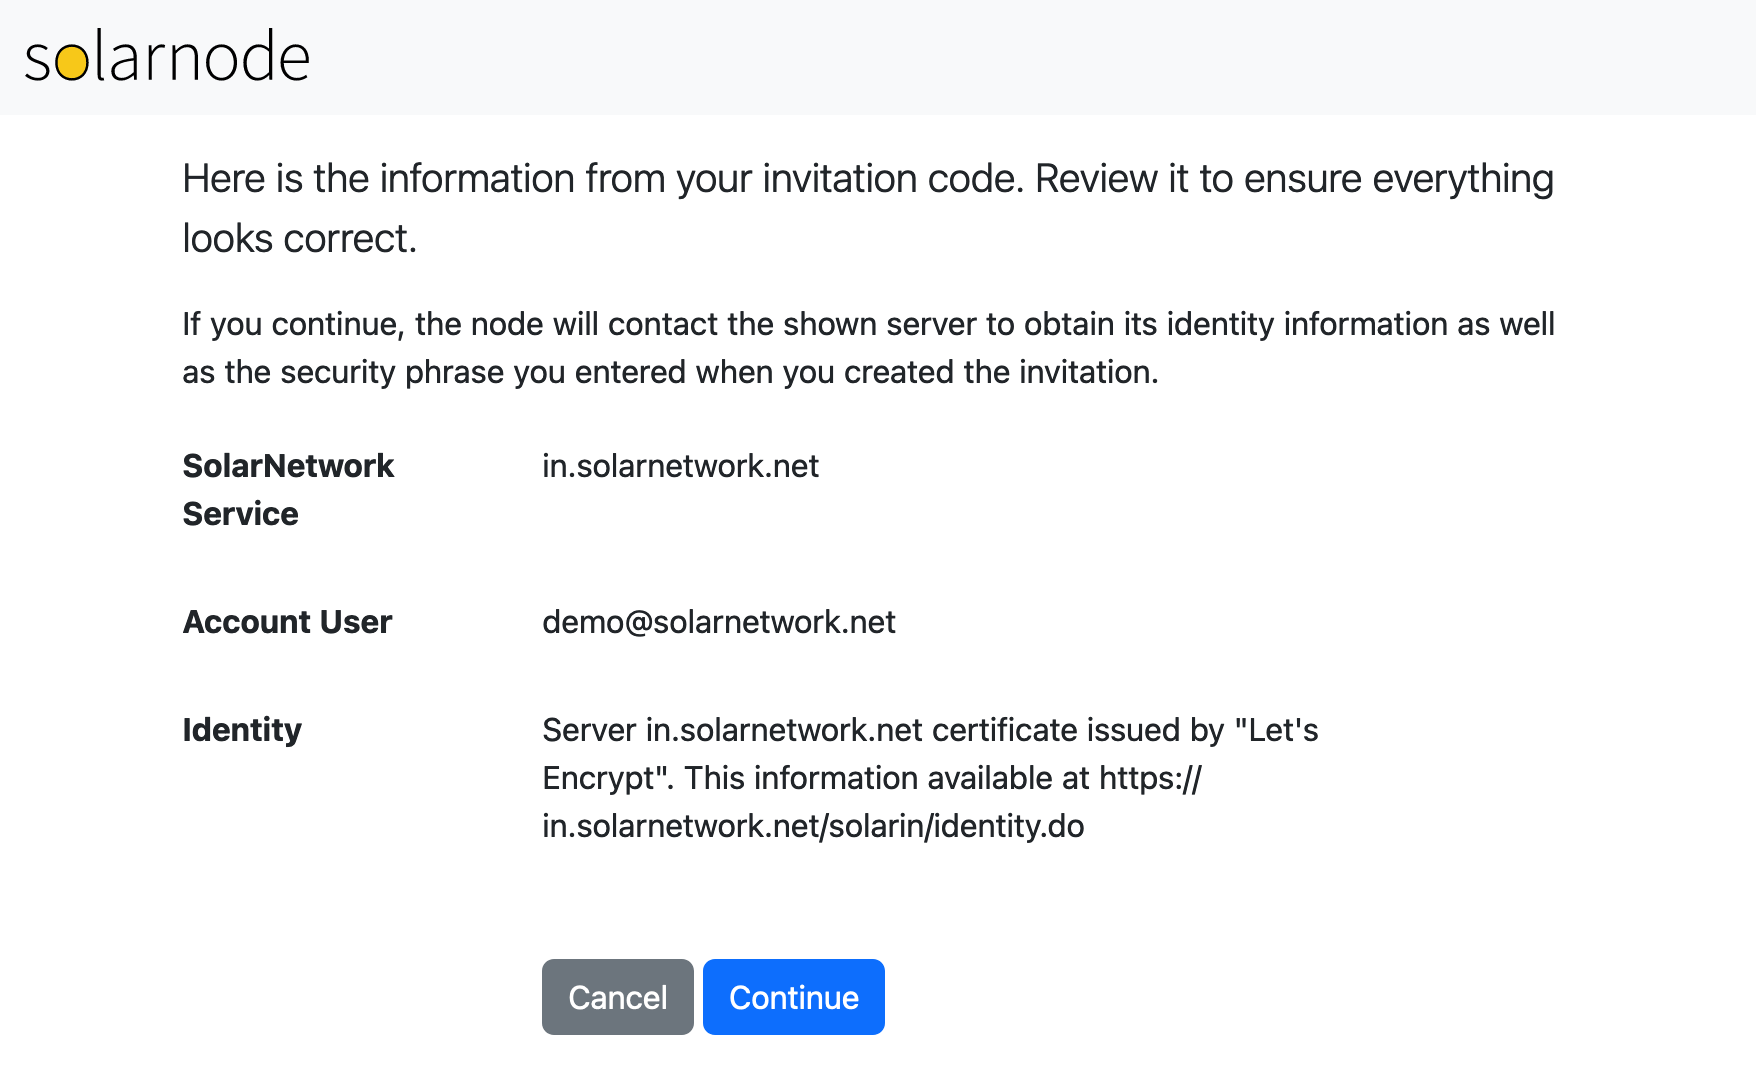
Next you preview the invitation details.
Note
The expected SolarNetwork Service value shown in this step will be in.solarnetwork.net.
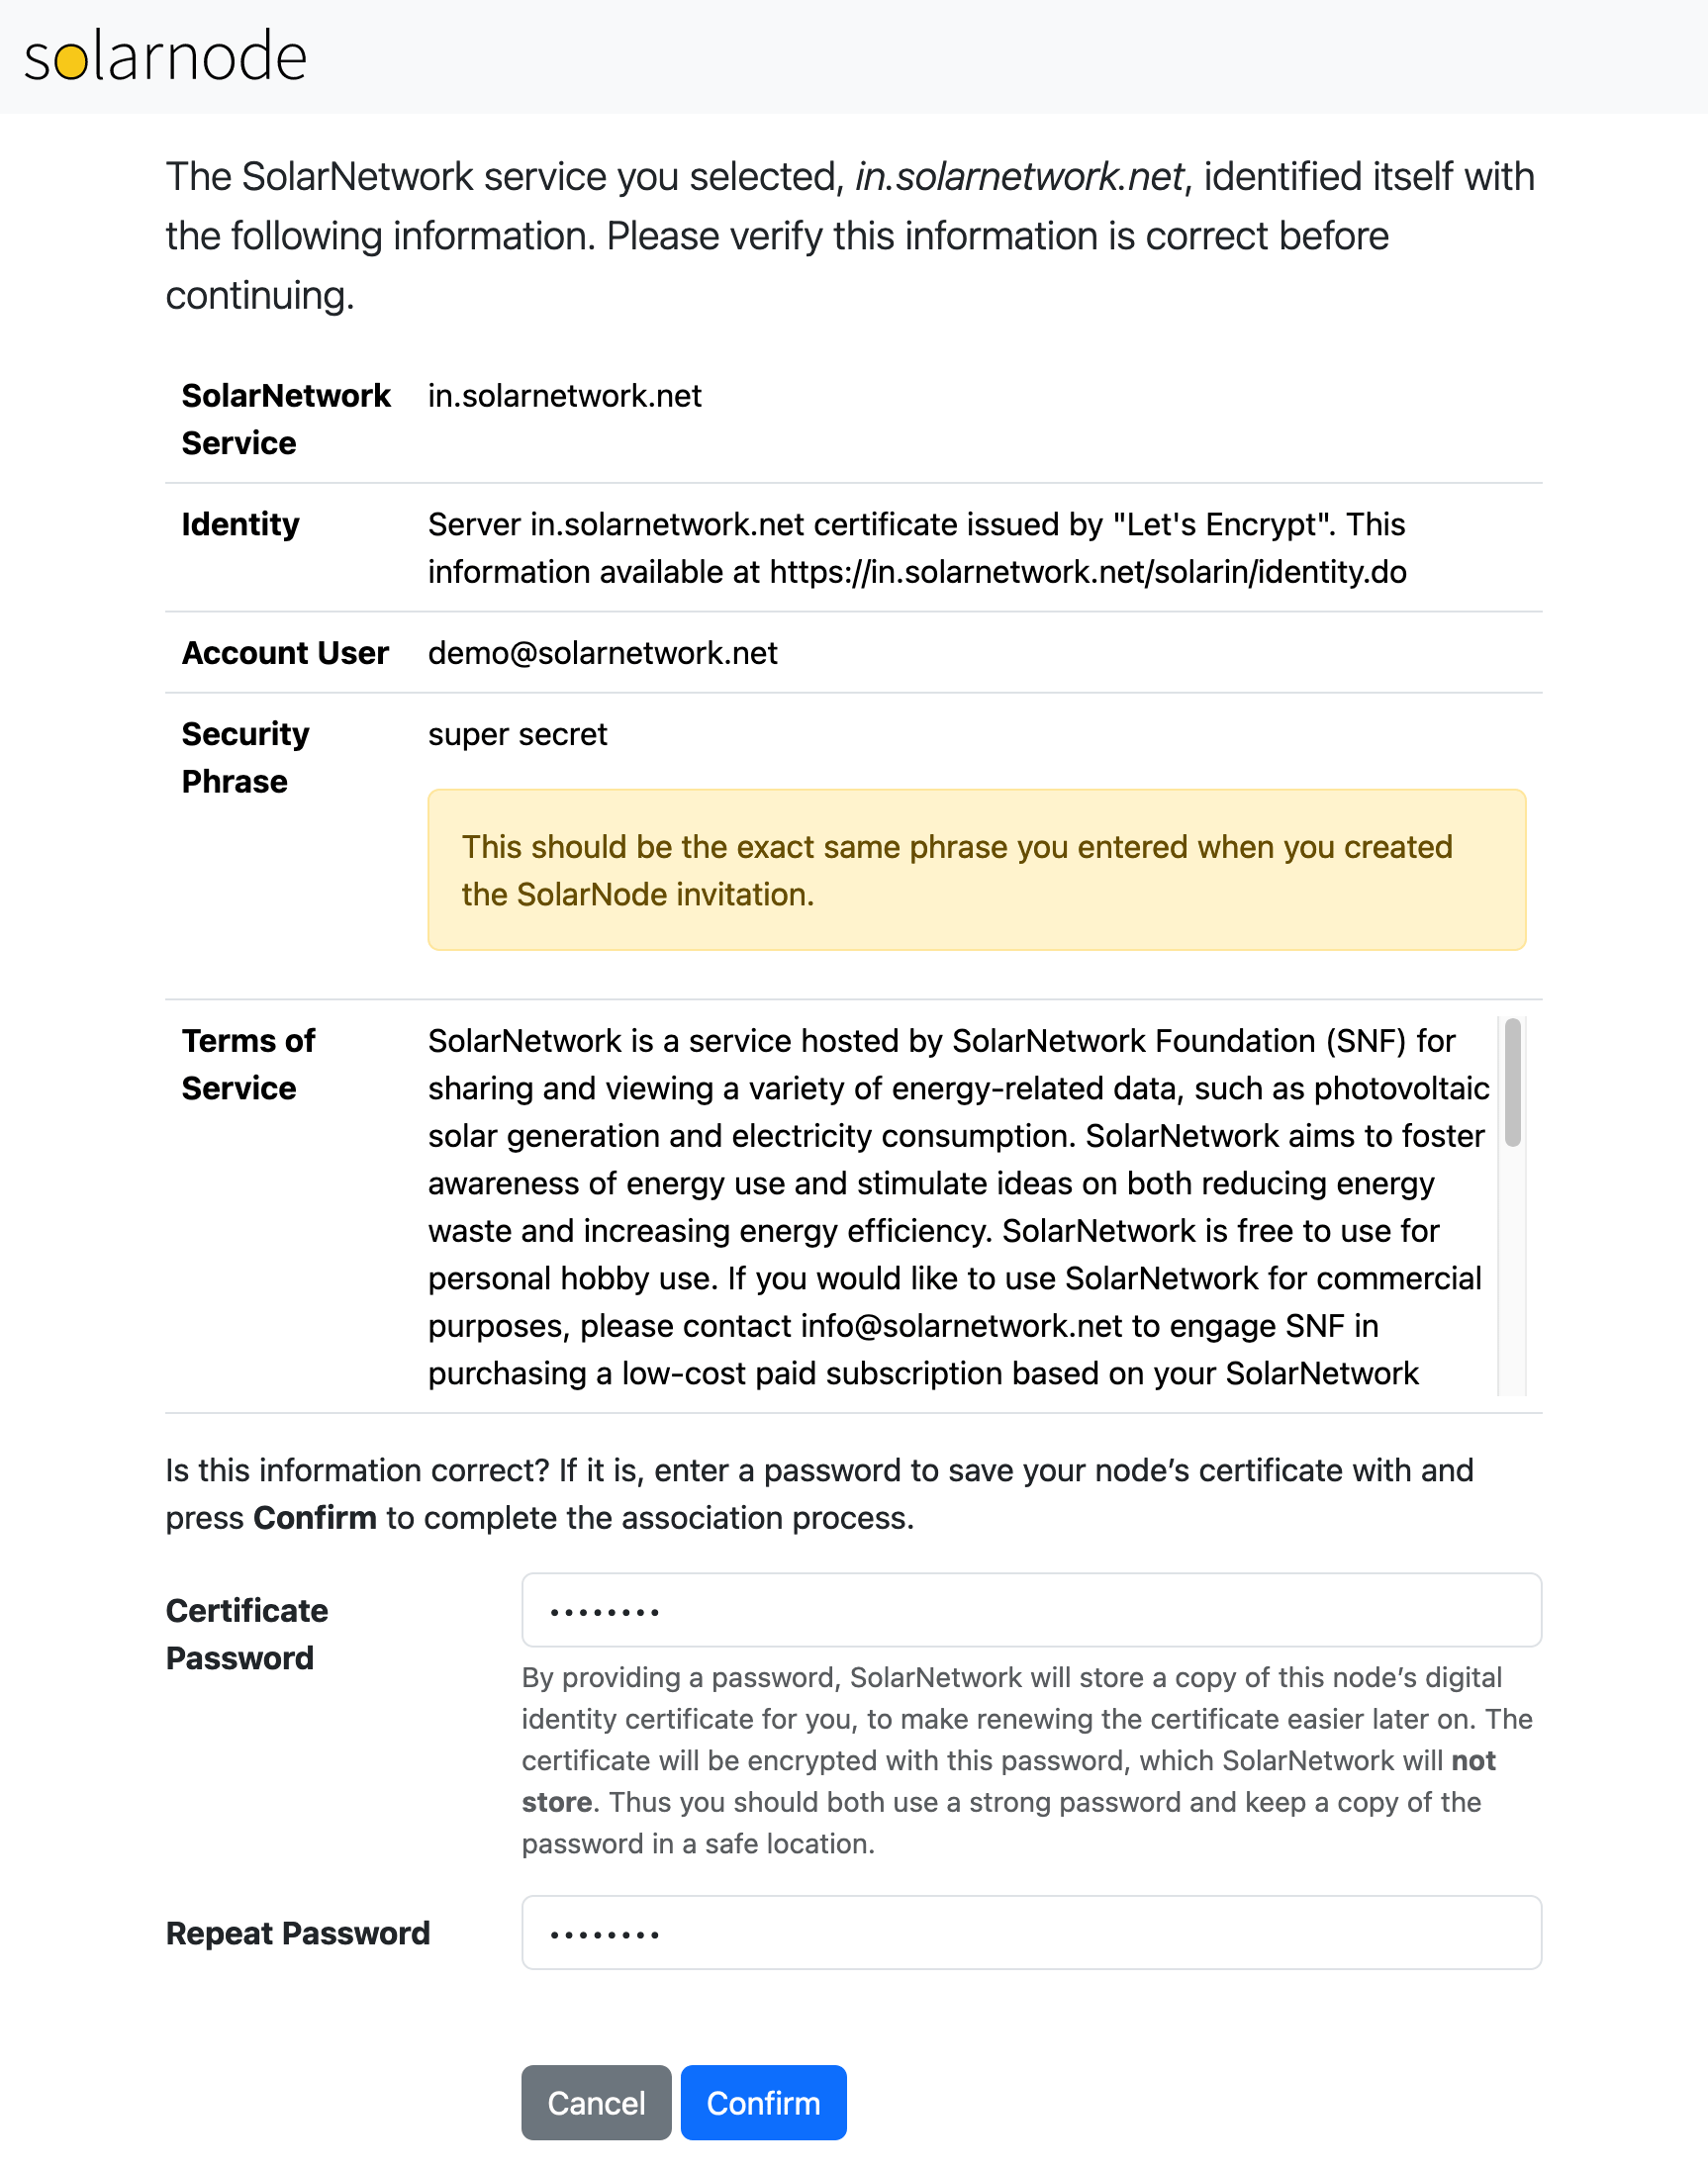
Finally, confirm the invitation. This step contacts SolarNetwork and completes the association process.
Warning
Ensure you provide a Certificate Password on this step, so SolarNetwork can generate a security certificate for your SolarNode.
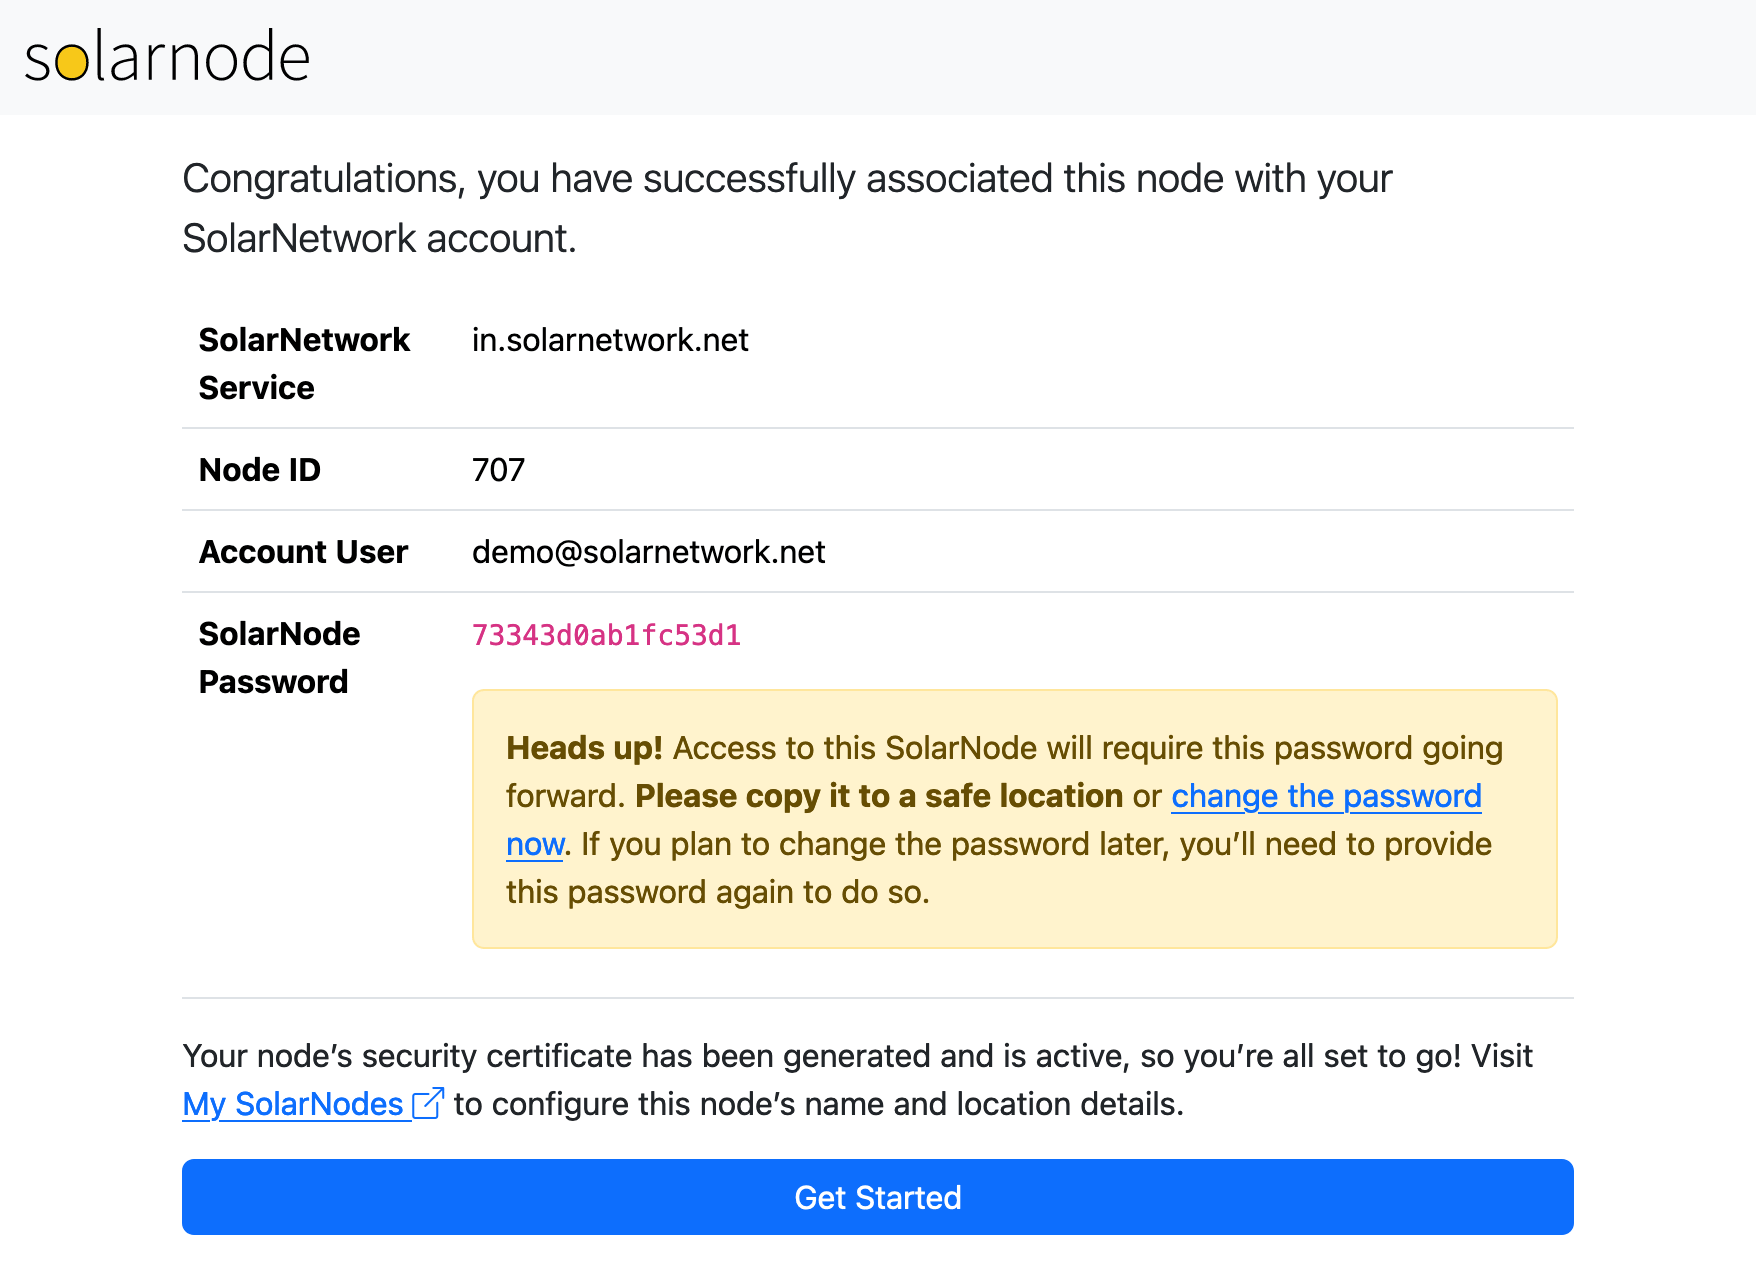
When these steps are completed, SolarNetwork will have assigned your SolarNode a unique identifier known as your Node ID. A randomly generated SolarNode login password will have been generated; you are given the opportunity to easily change that if you prefer.
Next steps
Learn more about the SolarNode Setup app.